A pretty awesome feature of any modern hypervisor is the ability to pass through physical devices like USB and PCIe, without using host drivers. Almost any PCIe device can be passed through, including GPUs. There are many guides online discussing GPU passthrough, including this one by @bryansteiner.
GPUs, however, aren't as easy because they are initialised before the operating system starts. Upon boot, the firmware (sometimes called BIOS) initialises the GPU into VGA mode and starts drawing immediately. Any graphical interface (including the Linux console) will be constantly writing frames to the video card. To free up a GPU for use, you can either go purchase and install an additional GPU or instruct the operating system to stop writing to the current one.
I'm not willing to spend on another GPU on my system, therefore I went the latter route. Most guides online mention using two GPUs, but doing so with one GPU will work too by configuring the system over SSH. I used Fedora Server as
As a electronics/design engineer cum software developer, I use a Macbook Pro running MacOS. For anyone familiar with MacOS and it’s never-ending battle to sparsely support all games and design productivity software, it would be needless to mention that running my suite of design/editing tools on MacOS was a pain.
Previously, I tried my best to switch to mostly Unix supporting open source variants of my design tools, such as KiCAD for PCB design and FreeCAD for 3D modelling. But some tools, are just no replacement for professional tools such as the Autodesk Suite. Not to mention, in many undergrad level EEE modules, board logic design IDEs (like Vivado for Xilinx FPGAs) only support Windows.
As such, it is the burden of students to either dual-boot, run a local VM, or get an additional Windows PC. Knowing the performance bottleneck for my 8GB RAM and 256GB SSD Macbook running VMs and professional productivity software, I wanted to find an alternative solution to this problem.
That’s when I
Some backstory:
I have a Dell U2713HM 27" monitor that has DisplayPort, DVI-D, VGA and HDMI input. I have a dock that only outputs HDMI, so to use my MacBook Pro with the Display I must connect with HDMI. However, the Dell U2713HM can't support its full resolution and frame rate over HDMI. I also previously used SwitchResX but the trial period ended and I am not willing to fork up $23 SGD for something that I can do myself and learn something new in the process.
How a monitor advertises its supported resolutions is by sending EDID metadata to the source. (Read more on Wikipedia) macOS has a feature called EDID overrides that can force a specific display to use a specific resolution. The EDID overrides shipped with macOS is found in /System/Library/Displays/Contents/Resources/Overrides. When a new display is connected, macOS will look in this folder by display vendor and product ID, and if that file exists, it will use the EDID data contained within the file instead of the one sent by th
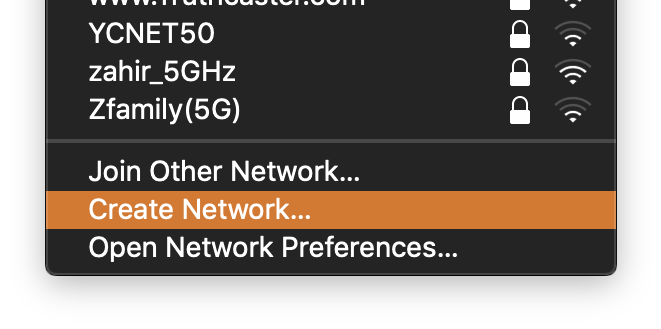
Ad-Hoc networks are useful when you just need a connection between a few machines with Wireless networking and no routers. It's an underused feature, but sometimes may be useful.
Setting up an Ad-Hoc network is pretty simple. In macOS, open the wireless panel in the menu bar and select "Create Network..."
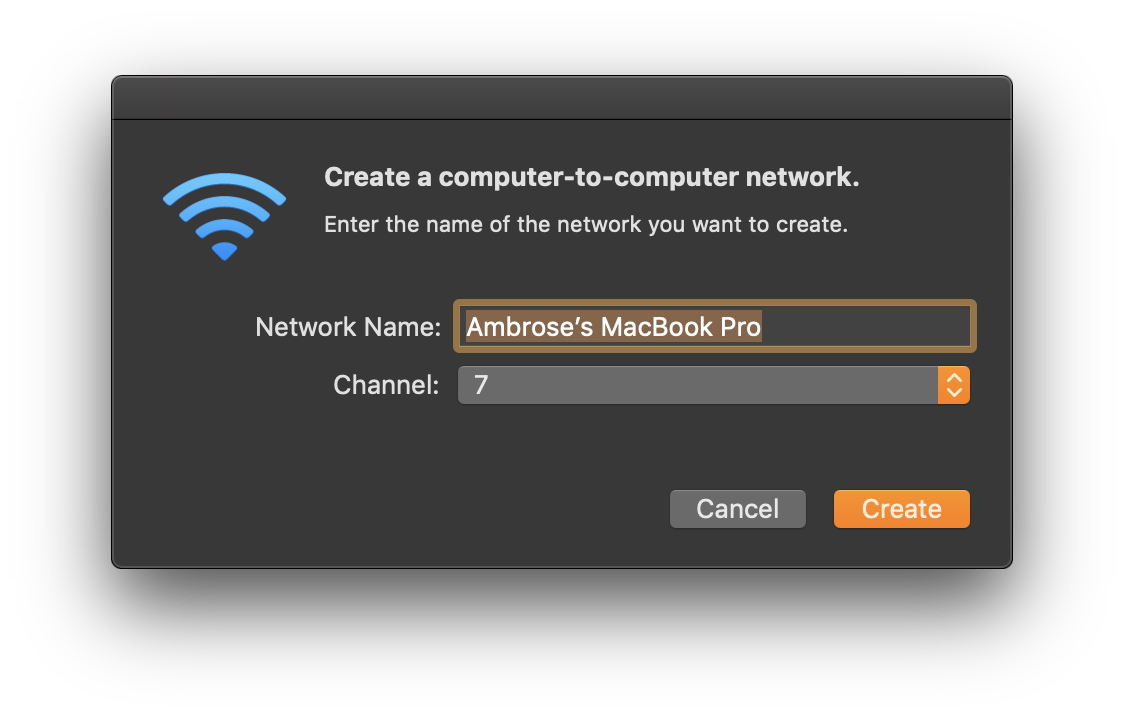
After that, set your network name and choose any channel.
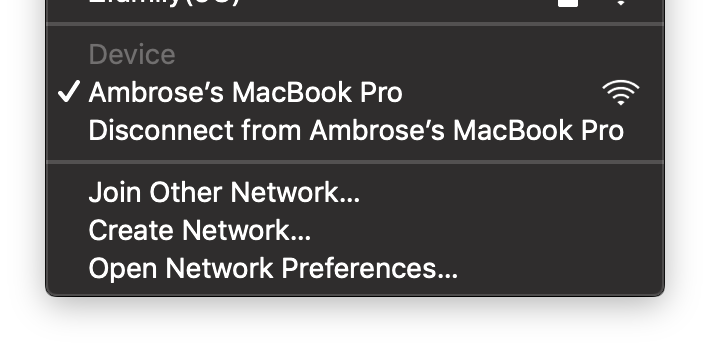
Your status bar should show this icon  and you'll be connected to your Ad-Hoc network.
Let's also configure it in Ubuntu 18.04 using netplan and iw.
/etc/netplan/20-adhoc.yaml:

network:
  version: 2
  renderer: networkd
  wifis:
    wlp5s0:
      access-points:
        "Ubuntu Machine":
          mode: adhoc
          password: password123
Using the iw command:
iw interface set type ibss
ip link set interface up
iw interface ibss join "Ubuntu Machine" 2442
In Windows 10, the command prompt has to be used to run the following commands:
netsh wlan set hostednetwork mode=allow ssid=Ahhh key=pass
It is not hard to get your hands dirty on computer networking basics and operating networking equipment. I've been running my own home network for the past 4 years and messing around with IPv6, VLANs and multiple networks, all without expensive racked routers or switches.
Router
The most important device you'll need is a router. Any computer with at least one Ethernet port is already a router. You can even use an old laptop as a router. (It comes with a free keyboard and mouse too!)
Alternatively, if you have an old consumer router and access point combination (wireless router) that comes from your ISP, it too can be used as an advanced router.
Usually, your computer or wireless router won't support advanced features like VLANs and have restrictive configuration options, so software is the next step in getting these devices bend to your will. There are a ton of router operating systems that you can install onto devices, or if you want to spend the extra effort, you can also use a Linux dis