Make your own Linux!
Building your own Linux OS from scratch is no dark magic, believe me! As long as you feel comfortable using a command line, it isn't such a daunting task, only requiring a fair amount of patience.
We'll be setting up an environment, compiling the kernel, userspace tools, a root filesystem and then test booting it. I'll assume you already run Linux on a machine, or in a Virtual Machine. Let's dive right in!
Environment
We'll first install the programs necessary for building. All these tools should be available in the major Linux distributions, but I'll only give the commands to install them on Debian/Ubuntu and Alpine Linux.
To compile the kernel, we need:
debian$ sudo apt install build-essential xz-utils libncurses5-dev bison flex bc perl libelf-dev libssl-dev  linux-headers-generic
alpine$ apk add apk add alpine-sdk xz ncurses-dev bison flex bc perl libelf-dev openssl-dev linux-headers findutils
Kernel
First we have to fetch the source.
$ KERNEL_VERSION=linux-4.18.6
$ wget https://cdn.kernel.org/pub/linux/kernel/v4.x/$KERNEL_VERSION.tar.xz
$ tar -xvf $KERNEL_VERSION.tar.xz
The source code now should be in linux-4.18.6/. We can now configure our Linux kernel with our own options by doing:
$ cd $LINUX_VERSION/
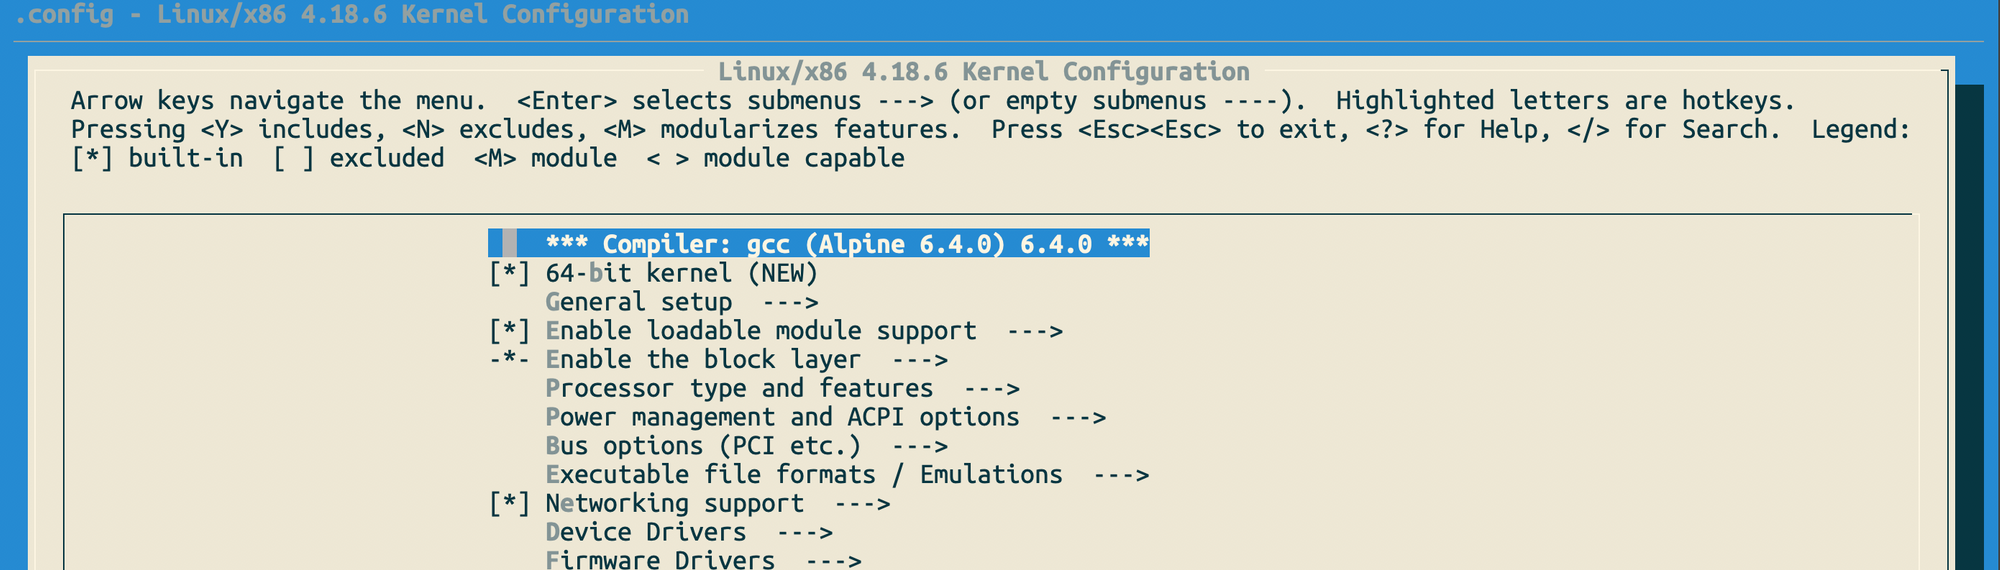
$ make defconfig && make menuconfig
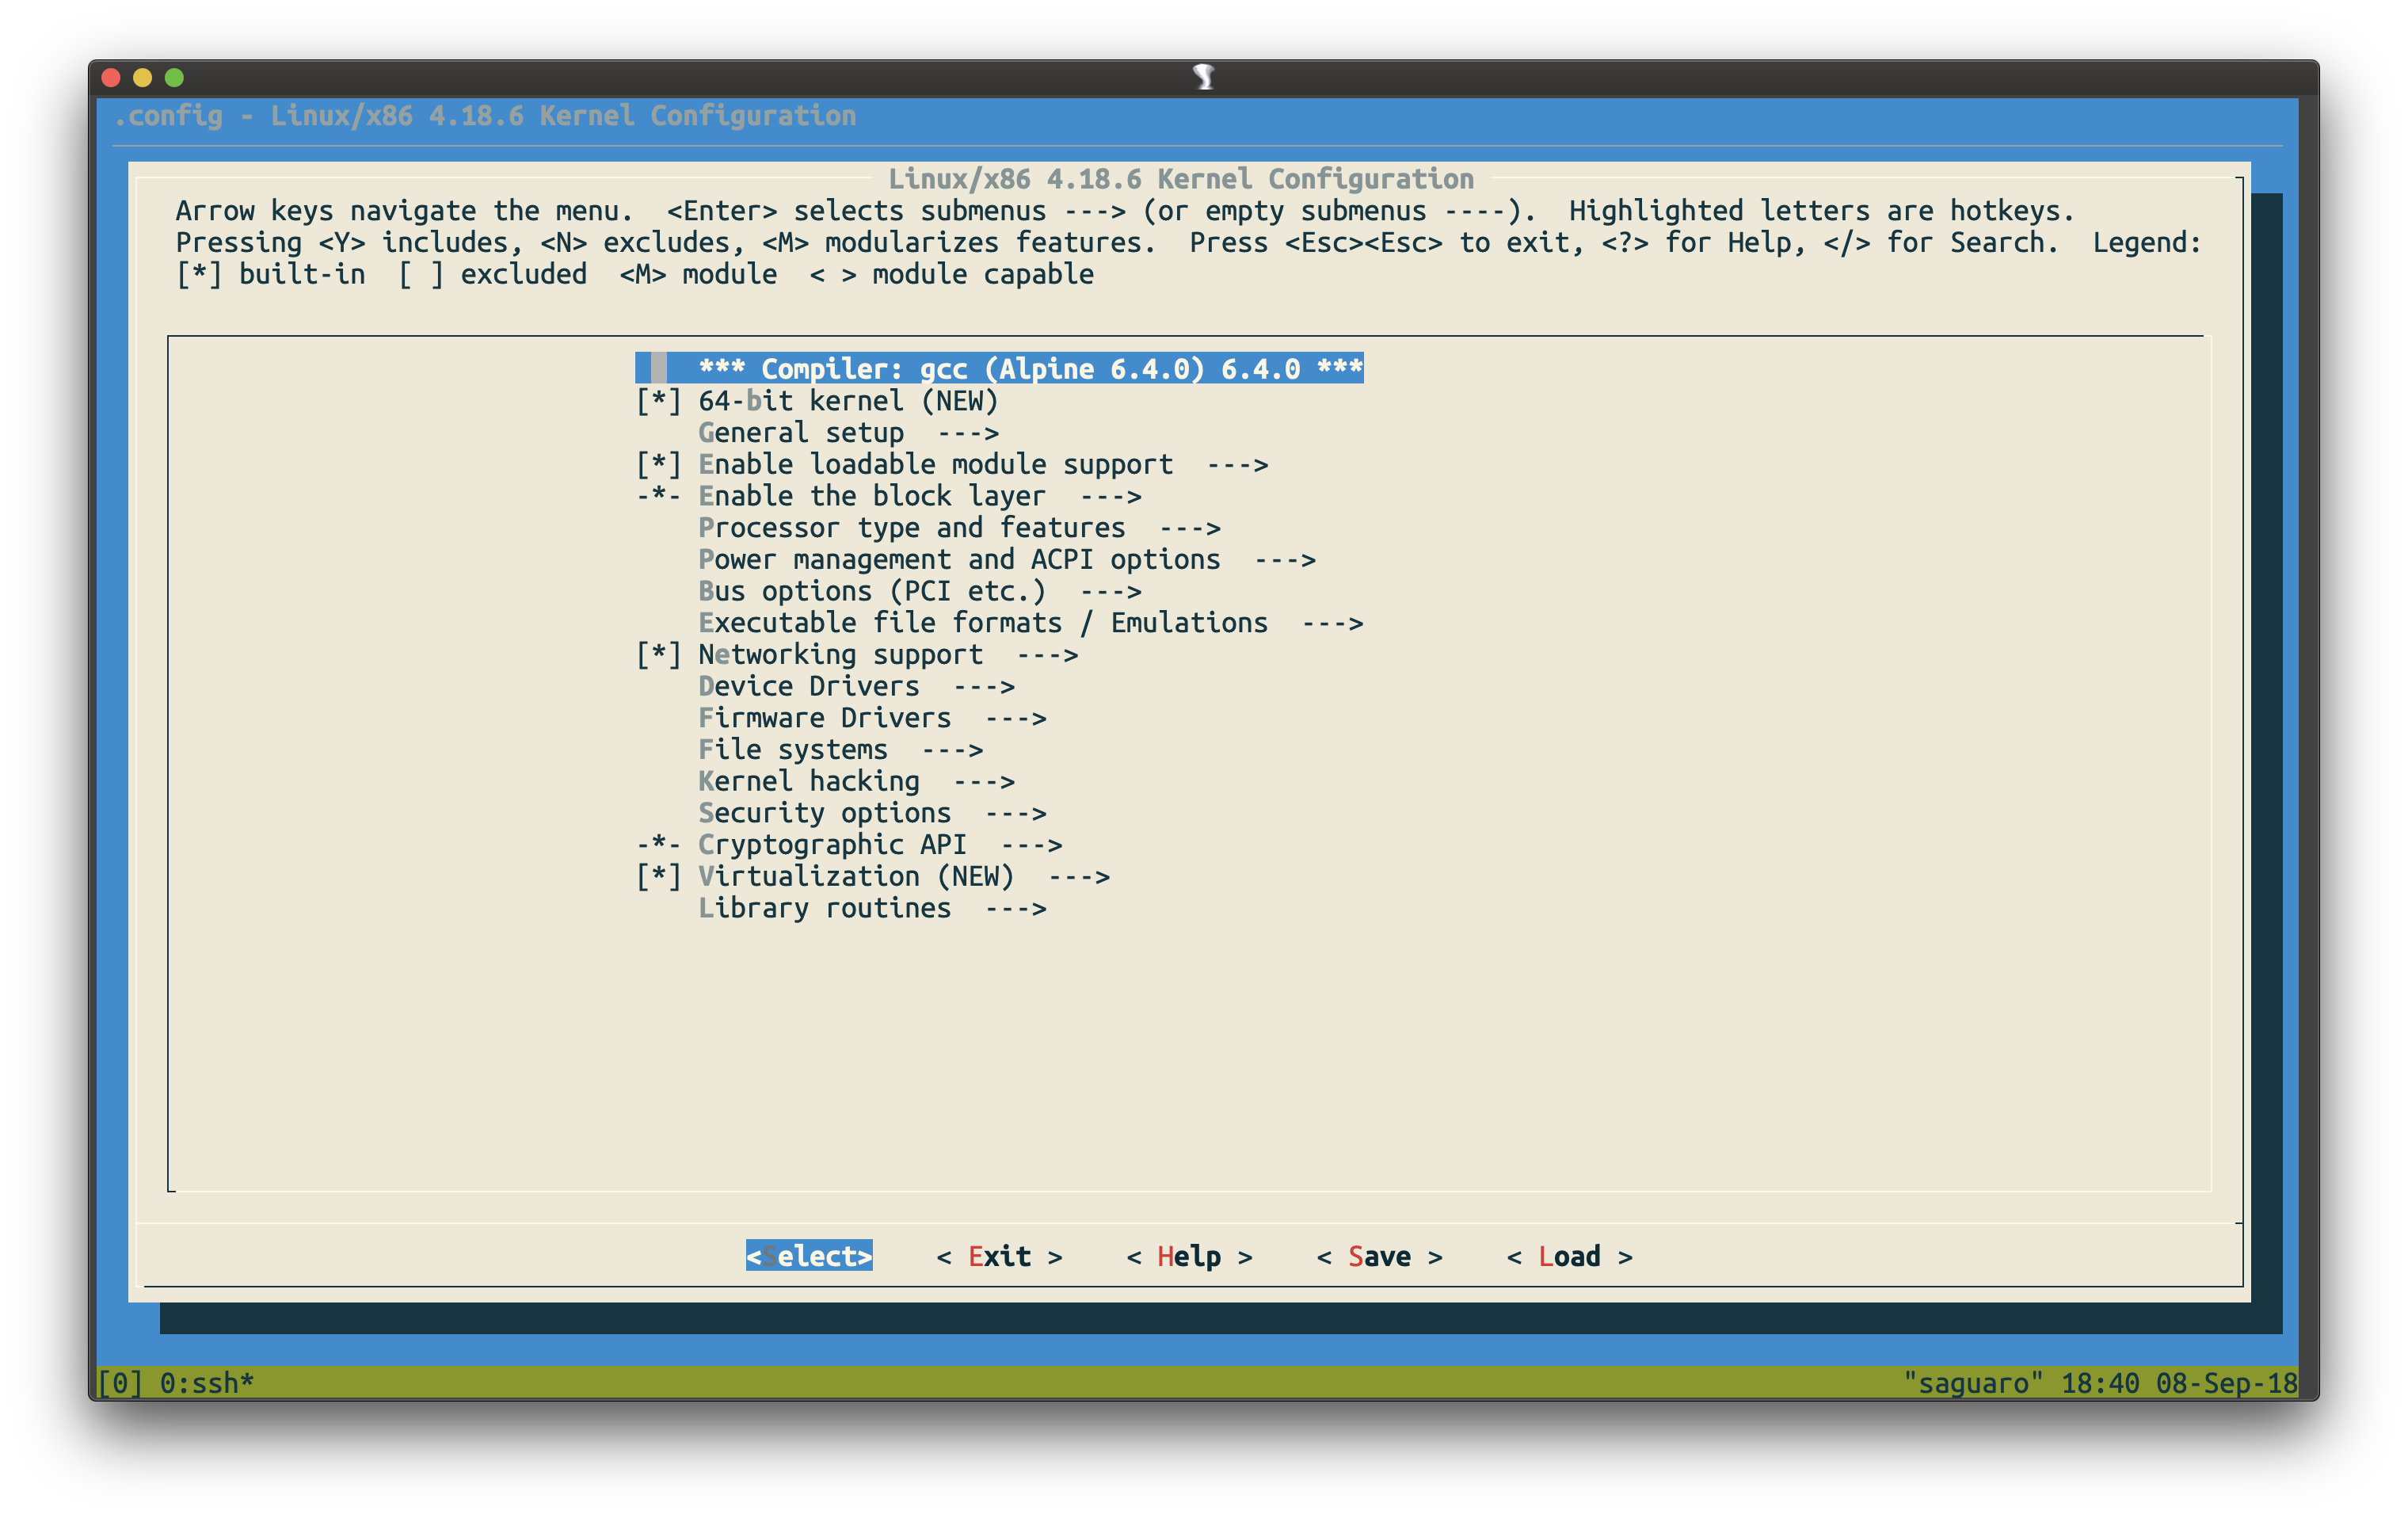
There are a lot of flags that you can customise using this menu, which I won't get into. For now, let's just save the default configuration by selecting "Save", "Ok", "Exit" and "Exit".
Now, all we need to do to compile our kernel is to run:
$ make -j$(nproc) all
...
System is 8121 kB
CRC 8cd7dc08
Kernel: arch/x86/boot/bzImage is ready  (#1)
$ cp arch/x86/boot/bzImage ../vmlinux
$ cd ..
After make finishes, it should show you the path to the resulting kernel image. We also should copy it out and then go back to the parent directory for the next step.
Busybox
A Linux system needs some userspace tools to be useable. Busybox includes many basic utilities we will need. Let's download Busybox source:
$ BUSYBOX_VERSION=busybox-1.29.2
$ wget http://busybox.net/downloads/$BUSYBOX_VERSION.tar.bz2
$ tar -xvf $BUSYBOX_VERSION.tar.bz2
$ cd $BUSYBOX_VERSION/
$ make defconfig && make menuconfig
After downloading the source, we can again use the menu-based configuration tool to customize our Busybox build. One thing you must enable is "Build static binary" under Settings, to ensure that we only depend on Busybox. Next, we can build it:
$ make -j12
$ make install
Busybox will produce a root filesystem in _install/ for us. Take a look, it's mostly just symbolic links to busybox
$ ls -l _install/bin/
$ cd ..
Root filesystem
Linux can boot into a root filesystem on a hard disk, or boot using an initramfs. A initramfs is an archive that the kernel will extract into memory to provide basic utilities that can be used for system maintenance.
Linux will look for a file /init when it boots and execute it. Linux trusts the script at being responsible for booting the rest of the system. Below is an example of a very basic script that will set up the basic mounts for a working system and then start the Busybox init daemon.
$ mkdir -p rootfs/
$ cat > rootfs/init << EOF
#!/bin/sh

echo "Setting up basic mounts"
set -x
mkdir -p /proc /sys /dev
mount -t proc -o noexec,nosuid,nodev proc /proc
mount -t sysfs -o noexec,nosuid,nodev sysfs /sys
mount -t devtmpfs -o exec,nosuid,mode=0755,size=2M devtmpfs /dev
mkdir -p /dev/pts /dev/shm
mount -t devpts -o gid=5,mode=0620,noexec,nosuid devpts /dev/pts
mount -t tmpfs -o nodev,nosuid,noexec shm /dev/shm
set +x

echo "We're done! Now starting the init daemon:"
set -x
exec /sbin/init
EOF
$ # Ensure all files inside rootfs is owned by root
$ chown -R 0:0 rootfs/
Now we can go ahead and build the entire root filesystem and busybox into an image. This image is packed using the CPIO file format and then compressed, but Linux provides tools to hide all that for us.
$ # Generate file list from the rootfs folder and busybox
$ ./$KERNEL_VERSION/scripts/gen_initramfs_list.sh \
    rootfs/ $BUSYBOX_VERSION/ > initramfs.list
$ # Build initramfs image
$ ./$KERNEL_VERSION/usr/gen_init_cpio \
    initramfs.list > initramfs.img
Test
We can now test our Kernel image using QEMU!
$ sudo qemu-system-x86_64 -m 512M -kernel vmlinux -initrd initramfs.img -append 'console=ttyS0' -machine pc-i440fx-2.11 -nographic
If it boots successfully to a shell, you've successfully compiled the kernel and initial filesystem from scratch!
I put all this commands into a Git repository here, nicely wrapped up in scripts.
In the upcoming second part to this article, I will show you how to install a bootloader and put your tiny OS onto a flash drive to be bootable.